Tag Archives: oregano

Bbq Fried Zucchini Ribbons

18 Jul

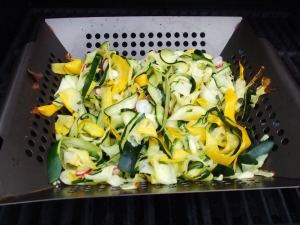
Admittedly, this is a dish I found on pinterest (my favorite place for recipes), but as always with any recipe I never follow it exactly. John bought me this really cool pan for the bbq, so I can now fry up my veggies straight on the grill.  This was my first time trying it and it worked out fantastic!  We always have a huge abundance of zucchini in the summer as they always produce prolifically, and I am always running out of ways to cook it.  I am sure this summer I will be posting several zucchini recipes, along with my classic way that I honestly got sick of, hence the discovery of:

BBQ Fried Zucchini Ribbons

DSCF0638

BBQ Fried Zucchini Ribbons

  • 3 medium sized zucchini, 2 green, 1 yellow (any combo will do, I just like color!)
  • olive oil
  • half of a lemon
  • several fresh basil and oregano leaves
  • a couple radishes
  • salt and pepper to taste

First take your zucchini and run a vegetable peeler along one of the sides to create “ribbons”, until you get down to the seeds and turn the zucchini over and continue on another side.  Do this until you only have the middle part left and throw into your compost bin.  Slice up a couple radishes thin and throw in.  Next, I Drizzled the olive oil and lemon and mixed until the ribbons are evenly coated.

Chop up your basil and oregano, toss that in along with your salt and pepper and your ready to cook!

Now you heat up your bbq on medium, and put your pan directly on the grill.  (or you can just fry this in a pan on your stove, but is that as much fun!???) Keep an eye on your zucchini and stir often.  I use tongs to turn over the zucchini until it’s evenly cooked all around, roughly 10 minutes.  Cook to the softness you personally enjoy, I like my zucchini well cooked so I probably could have gone longer!

It is all very foolproof, as long as you don’t walk away and forget about your dish!

Serve and enjoy! yum yum!
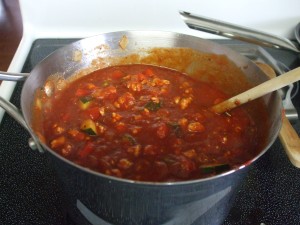
Tomato Pasta Sauce with Chicken and Vegetables

27 May

Pasta sauce was one of the first things I started experimenting with when I was first learning how to cook.  I have been inventing and re-inventing this recipe for years, while sticking mostly with my original concept.  Store bought pasta sauces just don’t cut it in our household.  John being part Italian and growing up with his Nona living him and my total distaste for “Ragu” makes it almost taboo here.  One day I will share John’s fantastic sauce recipe, but in the meantime here is mine.

This is a very light sauce and extremely healthy as I do not use beef in my sauce.  You will actually notice beef is not something I use ever, as I am completely unable to digest it and only make it special for John.  So for all you non-beefeaters out there, this is a great meat sauce alternative!

Tomato Pasta Sauce with Chicken and Vegetables

DSCF0616

  • 2 Tbsp olive oil
  • 3 cloves garlic, minced
  • 1 pack ground chicken
  • 1 medium onion, diced
  • 1 bell pepper, diced
  • 1 small zucchini, chopped into 1/2 inch chunks
  • 5 of the bigger sized cherry tomatoes in chunks
  • 1/2 cup white wine
  • 1 quart jar of tomato sauce (I use my own) or 2 big cans of tomato sauce
  • 1 can tomato paste
  • optional: 1 tbsp chicken fat (I usually have some in the freezer that I skimmed off the top of my chicken stock)
  • 2 tbsp chopped fresh basil
  • 2 tbsp chopped fresh oregano
  • 1 tsp sugar
  • fresh ground pepper
  • sea salt

Heat your pot on medium heat, put your olive oil in and let it warm up.  Put your garlic in and the ground chicken.  Brown up the ground chicken until there isn’t any pink left.  Add the onion, pepper, tomato, and zucchini.  Let everything fry up for a few minutes just to soften up the vegetables.

Add your wine and let boil for a couple minutes, so the chicken takes on a bit of the wine flavor.

Now, add the tomato sauce and paste and bring everything to a boil. Add your herbs, sugar, salt and pepper. Let simmer a few minutes and taste your sauce, this is where I tweek flavors.  If its too tangy, I add more salt and a bit more sugar.  This is your sauce so tweek to your preferences! Let simmer for about 10-15 minutes so the flavors meld together.

Serve over your favorite pasta and cheese and voila!

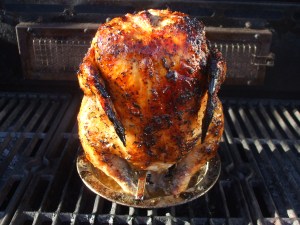
The Ultimate Beer Butt Chicken

7 May

I am sure a lot of you readers out there have done the classic Beer Butt Chicken, so we know how fantastic and juicy it is and how truly easy it is to make.  Well I have modified and perfected the way I do these chickens for ultimate flavor and juiciness!

DSCF0602

Ultimate Beer Butt Chicken

  • One Chicken
  • one can of beer of choice
  • 2-3 cloves of garlic, cut into chunks
  • herb mixture (I use dried oregano, basil, thyme, garlic powder and a little salt this time, but you can use anything you prefer)
  • optional: Fresh Rosemary Sprigs
  • One of those Beer Butt Chicken roasters (you can get them everywhere these days)

First order of operations is getting the BBQ warmed up, I heat it on medium heat.  You really don’t want to have it too hot.

Next thing is to get your chicken prepped.  I mix my herbs into a bowl (about a tsp of each, really you can’t mess this part up) and cut my garlic.  Take your can of beer and pour half of it out (drink it silly!).  I once was told that when you make this the beer doesn’t actually boil, so that was when I thought to pour half of it out, so it can actually be brought to a boil and steam up that chicken!

Put your garlic chunks into the can of beer, if your opting for the rosemary sprigs, put them in the can as well.  (I have done this and have actually tasted the rosemary throughout the meat).  Rub your herb mixture all over the chicken, making sure to cover all areas. Set your can into the roaster and put your chicken on. I also pour a bit of beer into the bottom of the roaster. Set carefully into your BBQ.

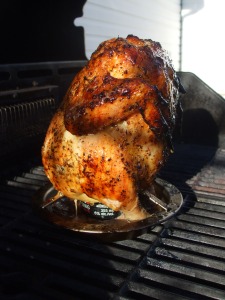
As for cooking times, I usually go for 15-20 minutes per pound.  I make sure I have my meat thermometer on hand, as long as the chicken is at 180 degrees Fahrenheit.  The key during cooking is to baste every 10-15 minutes, this way you get a nice skin, very little burning and nice beer flavor on the outside.

Once your done, take the chicken off and let rest 15 minutes before cutting, this is very important!  Then enjoy your juicy chicken goodness!

I also make a beer gravy from the juices and some of the beer from the can.  Goes very well with this chicken on some garlic mashed potatoes.

DSCF0603

I picked Black Label this time, different beers give different flavors so experiment!


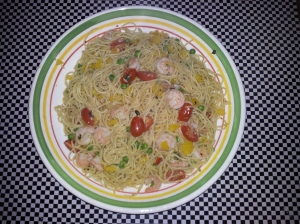
Garlic Shrimp Pasta

29 Apr

Often when I cook, I don’t really plan out what I am going to do.  I just sort of look in the fridge and freezer to analyze what I have on hand. Near the end of the week, my ingredients are starting to thin out, as I am due for a grocery run.  But somehow I manage to create the best meals this way! This just happened to be one of them, John and I struggled to not over eat with this meal (which we both did anyway). As always, the measurements aren’t exact because I rarely measure.  So just play around!

2013-04-27 19.27.05

Garlic Shrimp Pasta

  • 2.3 servings Spagettini
  • 1 cup or a little more than a cup of peeled Shrimp
  • Olive Oil
  • 2 cloves of Garlic, minced
  • White Wine
  • 1/2 sweet Pepper (use whatever color you have, I had yellow), diced
  • 1/4 cup Peas (I used frozen, but fresh would be better)
  • 2 Shallots, sliced thin
  • handful Grape Tomatoes, halved
  • fresh Thyme, chopped
  • fresh Oregano, chopped
  • Pepper
  • Sea Salt

First of all, get your water on the burner for your pasta, add some olive oil in the water to prevent the noodles from sticking together.  Chop up all your veggies in the meantime, so they are ready to go.

Heat a pan on medium heat and drizzle olive oil on the bottom and let the pan get hot.  Add your garlic and let fry for a little bit before adding the shrimp, be careful not to burn your garlic!  Add the shrimp and pour enough wine so it covers the whole bottom of the frying pan, throw in a pinch of salt at this point.

Let the shrimp cook for a couple minutes (until the shrimp are starting to look pink), by this time you may have some boiling water on your hands.  Add the spagettini and let boil 5-6 minutes.

Going back to your fry pan, add your peppers, shallots and peas, cook for a few minutes.  Drain your pasta and put aside. Add your tomatoes to the frying pan, and only cook for 30 seconds or so.

Start adding the pasta to your frying pan with a pair of tongs, a bit at a time.  Once the pasta is all in, start adding more olive oil and mixing the pasta so that the pasta is easy to manipulate in the pan but not getting too greasy!

Add some wine, just so nothing is sticking to the pan and the pasta can absorb some of the wine flavor. Toss in your fresh herbs next.  Keep mixing as you go, this time adding fresh ground pepper so its evenly distributed in the dish.  Use your discretion with the pepper, we used a lot because we like heat.  If you want it more mild, just add a bit.  Add salt in the same fashion, once again using your discretion.  I only added another pinch, we don’t eat a lot of salt in our food.

Now that all the ingredients are in, the pasta should have absorbed flavors, the tomatoes cooked but not over cooked and your shrimp shouldn’t be rubbery.  Toss in some Parmesan when you eat and voila!

Fantastico!

Seedling Sunday, on time and growing like mad!

28 Apr

We finally had some fantastic weather this week!  Lots of sun and it even reached past 20 degrees!
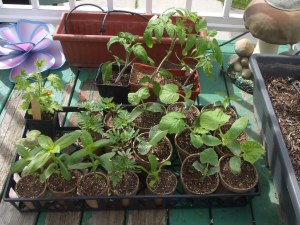
So we have some very happy seedlings!  On Tuesday I finally got around to transplanting a bunch of my babies.  Turns out the pots John brought me were the sort of paper kind, great!  That will work excellent!

Check out how much they have cranked right up, as I am officially letting these plants out in the day but bringing them in at night.

DSCF0595

Those tomato plants really grew and the stalk thickened up nicely.  Some of these will be planted into the ground soon.

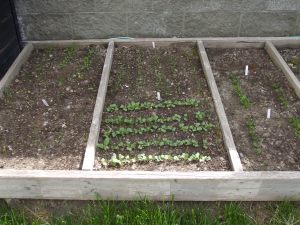
Let us check up on my spring garden, the radishes are really coming up now and I am salivating thinking about eating those delicious roots!

DSCF0597

Everything is really coming up nice, hopefully in a couple weeks I will have some spinach and lettuce to chow down on.

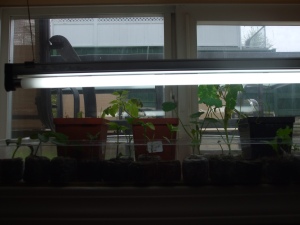
Now, we can’t forget about the little guys under the light still.  A couple of these plants were a little sad because the big plants I transplanted were blocking out their UV goodness.  They are happier now, I just have to baby them a little.  Today, I am going to transplant the nasturtiums.  They could go into the ground, but I am not too sure yet where I am going to place them so they can be in a pot for a little while. I also put a couple of the scraggly tomatoes back under the light to revive them!

DSCF0598

What isn’t pictured is my herb garden, it is really starting to flourish!  The oregano, thyme, lemon thyme, parsley, mint, marjoram, and sage have all come back from last year with vengeance!  I also planted my cilantro and lemon balm, as I figured they could handle the cold. So far, so good. Also, I put some sunflower seeds into the ground, it’s my first time trying them!  My main worry is all the birds we have around here snacking on them.

Yesterday was the first day this year I used fresh herbs out of my herb garden! I made an excellent shrimp pasta last night that I will share with you tomorrow!  I used the fresh thyme and oregano, and man it was so yummy!

Well now I must get my shoppping done so I am can get out there, as its a beautiful day today and there is always something to do in the garden.

Drunken Crockpot Chicken Thighs

10 Apr

I have some extra time this morning so I thought I would share this  super easy recipe I made for myself on Monday! My oh my was it fab!

My intention was to make the thighs to put into tacos or empanadas. Well I didn’t get around to that part and actually enjoyed them on their own (I don’t usually eat dark meat).

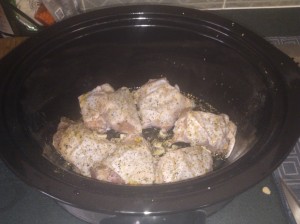
First I poured some wine (made from my parents chardonnay grapes, the wine isn’t totally drinkable but good to cook with!) in the bottom of the crock.  Place the thighs skin side up in the crock, I seasoned with cumin, oregano, onion powder, pepper and sea salt. I also sliced a couple cloves of garlic all over, the more the better! After that, I drizzled a little olive oil on top of the thighs, put the lid on and set it for 6 hours.

Here is a picture of the thighs in the crock, I never did get an after picture but man those thighs were so good!  So tender, even the next day when I brought a couple for lunch.  I still have a couple left that I will make tacos from tonight for dinner.

IMG270

This was so easy, anyone can do it! I ate this with a side of the greens I bought at Seedy Saturday and it was excellent!  Such an easy quick meal, we really have no excuse to not cook for ourselves (although going out is nice sometimes too!)

On another note:  My honey is finally coming home Friday night, after several schedule changes and 28 days later (hee hee).  When he is home, that is when I make my best food!  Can’t wait!

Jenn Crebas Photography

love. lifestyle. yoga

The Art and Science of Parenting

Learn how Darwin and the Dalai Lama would raise their love child

Wine Country BC

Beyond the Guided Tour of Wine in British Columbia

gitanalife

tales of la vida gitana